以前解决过一次这个问题
但是当时只是说明了用gparted来解决,不过没有详细说明操作步骤。
0.增加磁盘大小
由于我是VMWare虚拟机里面,所以先在settings里面选中Hard Disk,然后Utilities里面Expand输入想要增加的大小,如我的5G。如果是物理磁盘,则需要没有分区的磁盘空间。
1.增加分区大小
先查看分区大小(下面是我的成功添加5G后的)
[root@localhost rexdf]# fdisk -l

Disk /dev/sda: 16.1 GB, 16106127360 bytes
255 heads, 63 sectors/track, 1958 cylinders
Units = cylinders of 16065 * 512 = 8225280 bytes
Sector size (logical/physical): 512 bytes / 512 bytes
I/O size (minimum/optimal): 512 bytes / 512 bytes
Disk identifier: 0x00059acf

   Device Boot      Start         End      Blocks   Id  System
/dev/sda1   *           1          64      512000   83  Linux
Partition 1 does not end on cylinder boundary.
/dev/sda2              64        1959    15215616   8e  Linux LVM

Disk /dev/mapper/vg_livecd-lv_root: 13.5 GB, 13497270272 bytes
255 heads, 63 sectors/track, 1640 cylinders
Units = cylinders of 16065 * 512 = 8225280 bytes
Sector size (logical/physical): 512 bytes / 512 bytes
I/O size (minimum/optimal): 512 bytes / 512 bytes
Disk identifier: 0x00000000


Disk /dev/mapper/vg_livecd-lv_swap: 2076 MB, 2076180480 bytes
255 heads, 63 sectors/track, 252 cylinders
Units = cylinders of 16065 * 512 = 8225280 bytes
Sector size (logical/physical): 512 bytes / 512 bytes
I/O size (minimum/optimal): 512 bytes / 512 bytes
Disk identifier: 0x00000000
启动gparted的livecd [caption id=”attachment2047” align=”alignnone” width=”722”] 键盘设置[/caption] [caption id=”attachment2048” align=”alignnone” width=”738”]
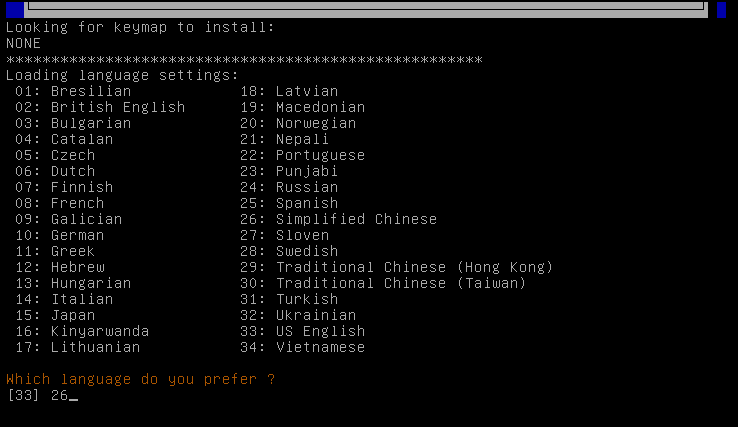 语言选择[/caption] [caption id=”attachment2049” align=”alignnone” width=”743”]
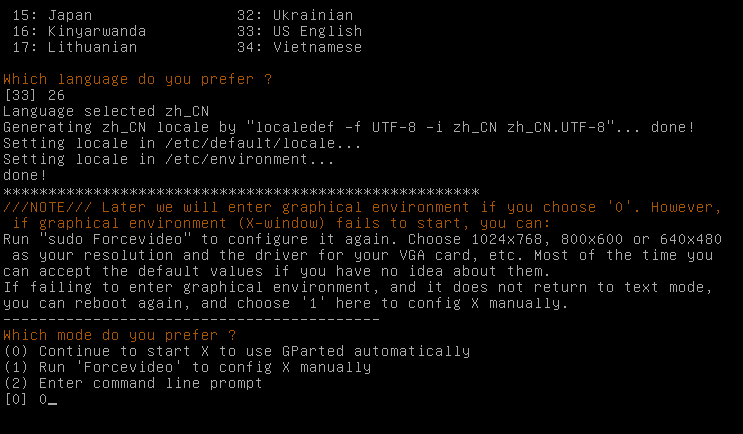 启动图形界面[/caption] [caption id=”attachment2050” align=”alignnone” width=”635”]
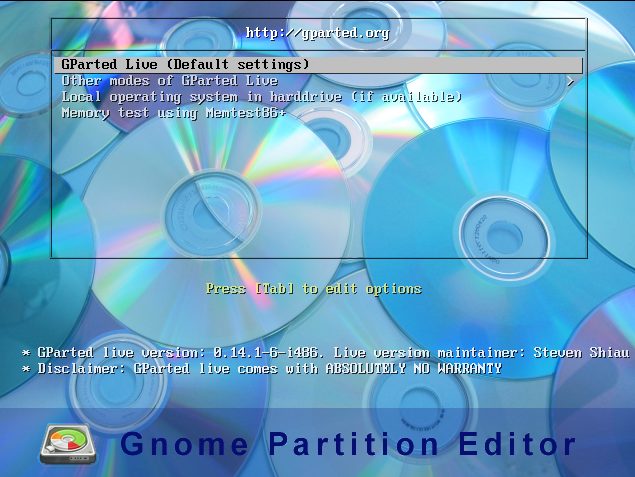 默认选项[/caption] [caption id=”attachment2051” align=”alignnone” width=”805”]
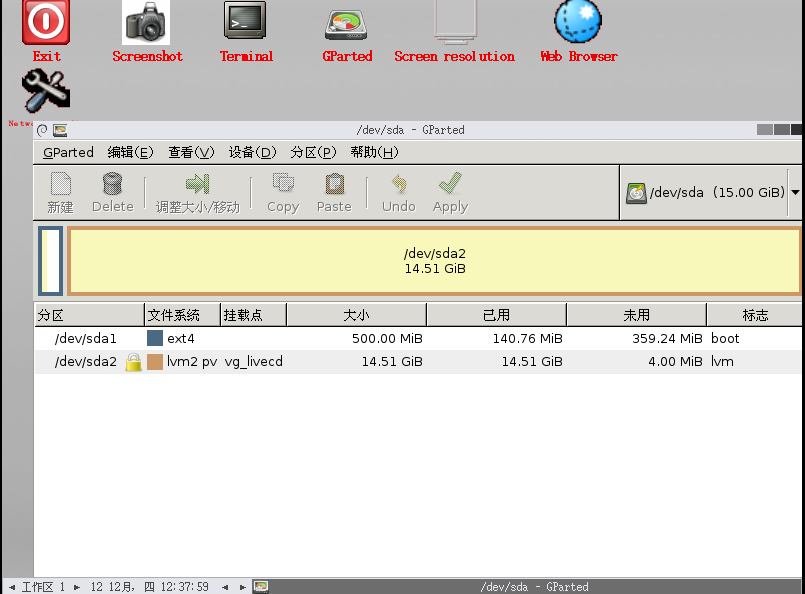 界面[/caption] [caption id=”attachment2052” align=”alignnone” width=”799”]
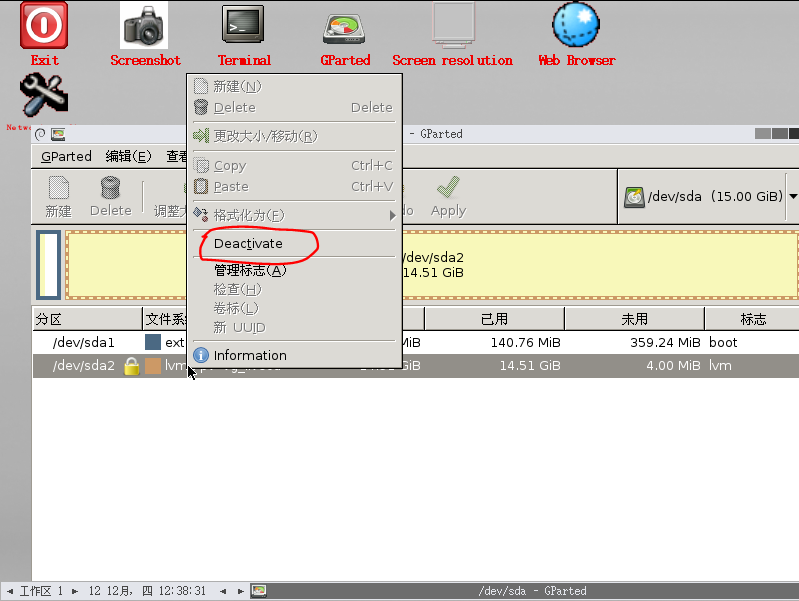 反激活[/caption] [caption id=”attachment2053” align=”alignnone” width=”790”]
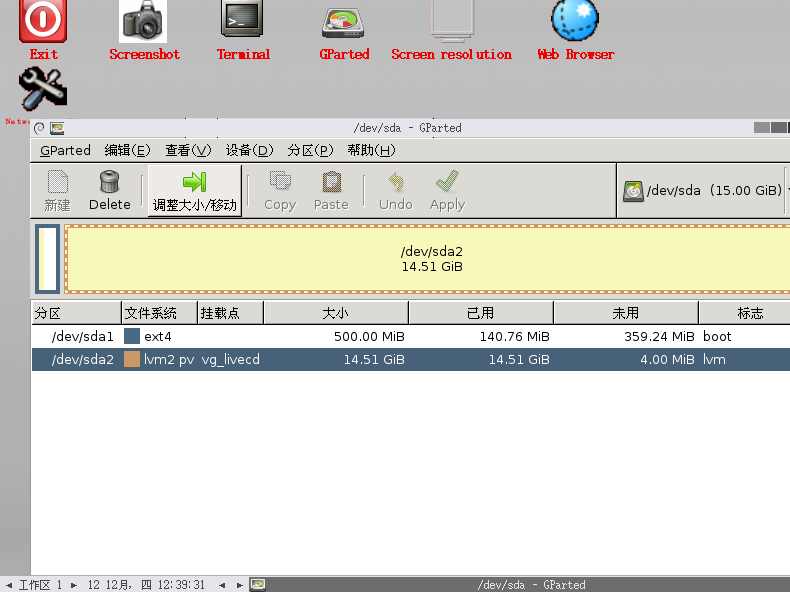 可以调整大小了[/caption] [caption id=”attachment2054” align=”alignnone” width=”798”]
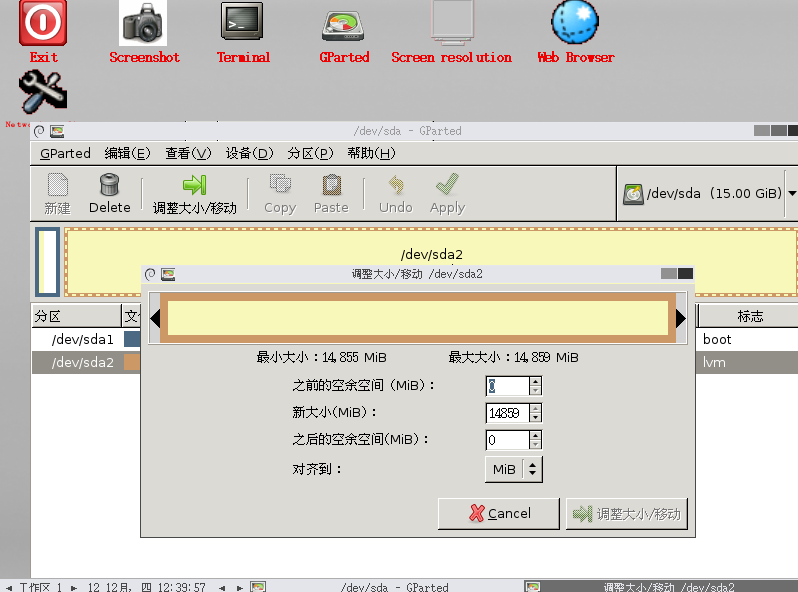 调整大小[/caption] [caption id=”attachment2055” align=”alignnone” width=”799”]
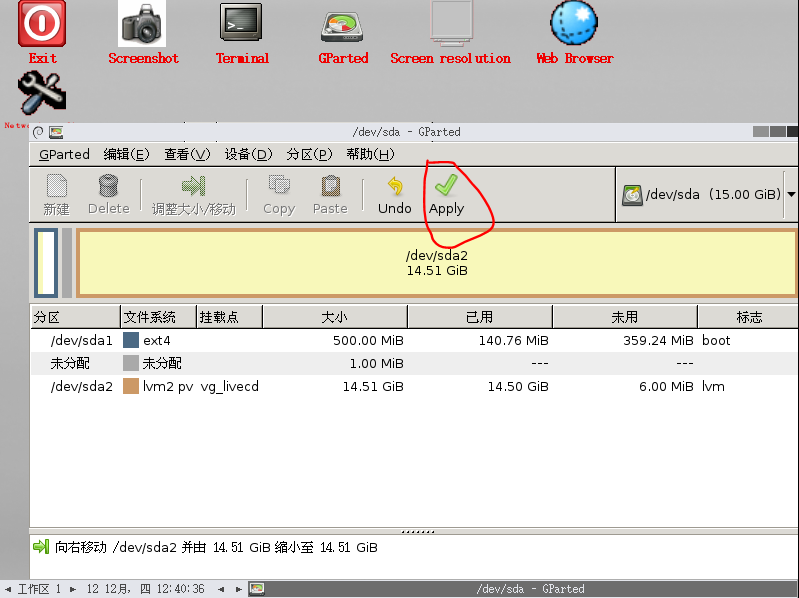 点击apply,执行[/caption] [caption id=”attachment2056” align=”alignnone” width=”795”]
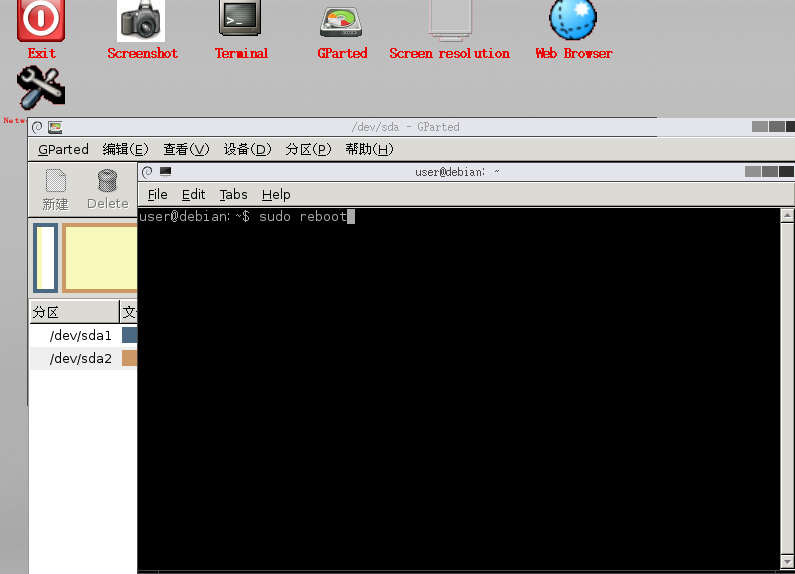 重启[/caption] [caption id=”attachment_2057” align=”alignnone” width=”819”]
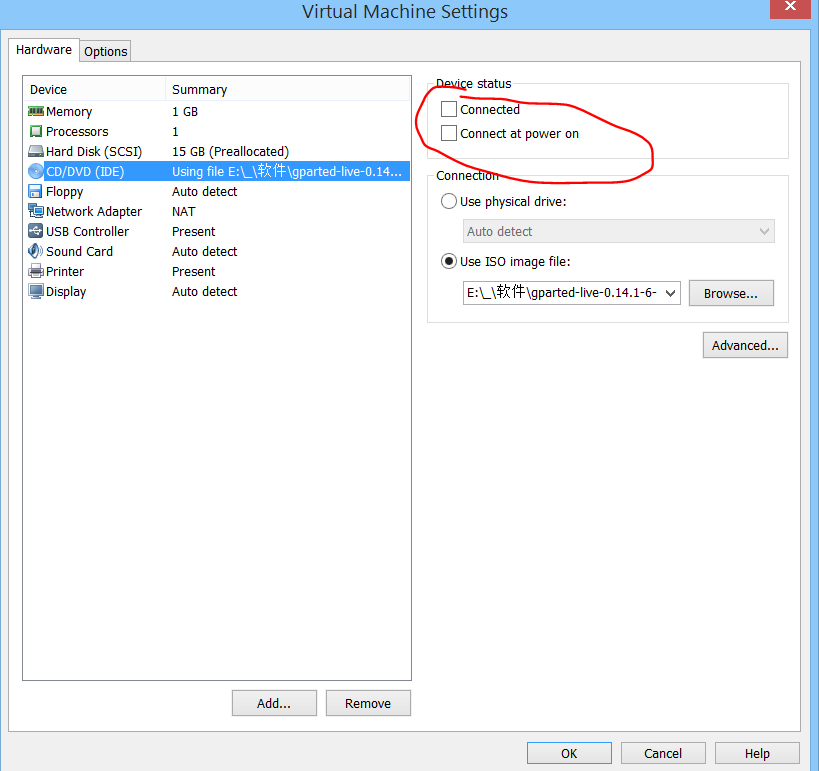 重启后,弹出光驱[/caption]
2.修改逻辑分区大小
先查看挂载点
[root@localhost rexdf]# df -h
Filesystem                     Size  Used Avail Use% Mounted on
/dev/mapper/vg_livecd-lv_root   13G  6.9G  5.5G  56% /
tmpfs                          495M  372K  494M   1% /dev/shm
/dev/sda1                      485M  125M  335M  28% /boot
分区使用的lvm来管理的,这样可以方便挂载。
#/dev/mapper/vg_livecd-lv_root增加10G
lvextend -L+10G /dev/mapper/vg_livecd-lv_root
#检查ext2、ext3、ext4等文件系统的正确性,类似win的chkdsk命令,可有可无,如果上面命令报错则必须
e2fsck -f /dev/mapper/vg_livecd-lv_root
#ext2/ext3/ext4文件系统重定义大小工具
resize2fs /dev/mapper/vg_livecd-lv_root
在执行上面之前需要先umount,由于我的是/目录所以是不可能umount的,故需要使用live_cd启动系统。 在这里执行umount /会提示busy的。 在live_cd启动后,打开terminal,su换到root账户fdisk -l查看被挂载到哪里了,然后执行lvextend 、e2fsck 、resize2fs 即可。